8.5 KiB
How to run the unRaid mover for qBittorent seeding torrents
When you make use of the unRaid cache drive for your /data/torrents share and the torrents in qBittorent are still seeding then the mover can't move files, because they are still in use.
Using the following instructions you will be able to move the files with the use of the qBittorrent API.
!!! abstract "Workflow Rules - [CLICK TO EXPAND]"
1. Pause torrents older than last x days.
1. Run the mover.
1. Resume the torrents once the mover is completed.
Warning
!!! Danger "If you make use of the Seed Time/Ratio settings in your Indexers settings in the Starr apps1.
Make sure you're using Post-Import Category in your Starr apps Download clients settings.
Else it could happen when the torrents get paused that they get removed by the Starr apps before the seeding goal is reached."
!!! warning The screenshots are just examples to show you how it should look and where you need to place the data that you need to add, they aren't always a 100% reflection of the actual data and not always 100% up to date with the actual data you need to add.
- Always follow the data described in the guide.
- If you got any questions or aren't sure just click the chat badge to join the Discord Channel where you can ask your questions directly.
Needed
The Script
Download the following standalone script.
- Script{:target="_blank" rel="noopener noreferrer"}
Big Thnx to bobokun{:target="_blank" rel="noopener noreferrer"} Developer of qBit Manage{:target="_blank" rel="noopener noreferrer"}
Plugins
Install the following Plugins.
Setup
After you installed the needed Plugins it's time to configure everything.
qBit API
The script needs the qBit API to work, so we need to make sure it's installed when your unRaid server is booted or when the Array is started the first time.
You can choose from the following 2 options how you want to install it, depending what you preferce.
User scripts
With this option we're going to install the qBit API when the Array is started the first time.
Go to your unRaid Dashboard to your settings tab and select in the User Utilities at the bottom the new plugin you installed User Scripts.
Select at the bottom ADD NEW SCRIPT.
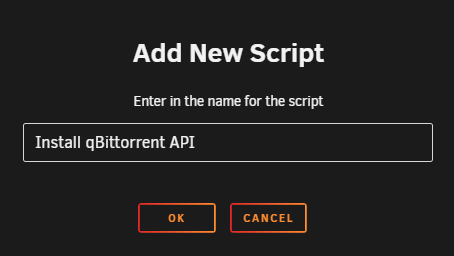
A popup will appear where you can give it a name, for this example we're going to use Install qBittorrent API and then click on OK.
Click in the list on the cogwheel of the new user scrip you made.
Copy/Paste in the new windows that opens the following bash command followed by SAVE CHANGES.
#!/bin/bash
pip3 install qbittorrent-api
Select in the schedule list when the script should run, and choose At First Array Start Only.
Click on RUN IN BACKGROUND or restart your unRaid server so the qBit API is installed.
Go File
With this option we're going to install the qBit API when the unRaid server is started.
On your USB stick/key go to /boot/config and open the go file with your favorite editor (VSCode{:target="_blank" rel="noopener noreferrer"}/Notepad++{:target="_blank" rel="noopener noreferrer"}) and copy/paste the following command.
pip3 install qbittorrent-api
Restart your unRaid Server, or run the above command from the terminal.
Script
Edit the script with your favorite editor (VSCode{:target="_blank" rel="noopener noreferrer"}/Notepad++{:target="_blank" rel="noopener noreferrer"}) you downloaded at the beginning of the guide HERE.
You only need to edit a few options in the script
# --DEFINE VARIABLES--#
# Set Number of Days to stop torrents between two offsets
# days_from set to 0 will pause any torrents from todays date
# days_to will be the upper limit of how far you want to pause torrents to
days_from = 0
days_to = 2
qbt_host = "192.168.2.200:8080"
qbt_user = None
qbt_pass = None
# --DEFINE VARIABLES--#
days_from=> Set Number of Days to stop torrents from for the move.days_to=> Set Number of Days to stop torrents to for the move.qbt_host=> The URL you use to access qBittorrent locally. (the"should remain)qbt_user=> Your used qBittorrentUser Nameif you have authentication enabled. Add'either side.qbt_pass=> Your used qBittorrentPasswordif you have authentication enabled. Add'either side.
!!! warning ""
Depending on whether you use the unRaid Mover Tuning app, You might need to change line 68:
- If you do not use `Mover Tuning`, change **line 68** from `os.system('/usr/local/sbin/mover.old start')` to `os.system('/usr/local/sbin/mover start')`
- If you use `Mover Tuning` but **don't** want to use it for the script, do not change **line 68**
- If you use `Mover Tuning` and **do** want to use it for the script, change **line 68** from `os.system('/usr/local/sbin/mover.old start')` to `os.system('/usr/local/sbin/mover start')`. For this option, inside the `Mover Tuner` options you will also need to set `Move Now button follows plugin filters` to `Yes` and `Disable Mover running on a schedule` to `No`.
Copy script to your preferred location
Now it's time to place the script you just edited somewhere easy to access/remember.
Suggestions:
/mnt/user/appdata/qbittorrent/scripts(yes you need to create this folder your self)/mnt/user/data/scripts(yes you need to create this folder your self)
Final steps
Now it's time to setup the scheduler when the mover should run.
Go to your unRaid Dashboard to your settings tab and select in the User Utilities at the bottom the new plugin you installed User Scripts.
Select at the bottom ADD NEW SCRIPT.
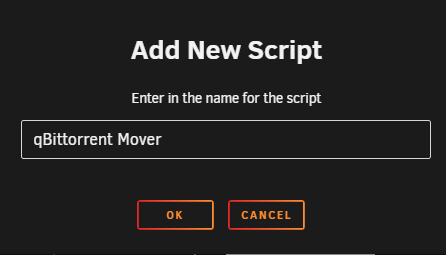
A popup will appear where you can give it a name, for this example we're going to use qBittorrent Mover and then click on OK.
Click in the list on the cogwheel of the new user scrip you made.
Copy/Paste in the new windows that opens the following bash command followed by SAVE CHANGES.
#!/bin/bash
/usr/local/emhttp/plugins/dynamix/scripts/notify -s "qBittorrent Mover" -d "qBittorrent Mover starting @ `date +%H:%M:%S`."
echo executing script to pause torrents and run mover.
/usr/bin/python3 /mnt/user/data/scripts/mover.py
echo qbittorrent-mover completed and resumed all paused torrents.
/usr/local/emhttp/plugins/dynamix/scripts/notify -s "qBittorrent Mover" -d "qBittorrent Mover completed @ `date +%H:%M:%S`."
!!! info
Replace the /mnt/user/data/scripts/mover.py path to the path where you placed your python script.
Select in the schedule list when the script should run, and choose Custom
After changing to Custom you get on the right a extra option where you can setup your cron schedule when it should be run.
For this example we're going to let the script run a 4am at night. 0 4 * * *
Setup your own schedule HERE
--8<-- "includes/support.md"


